After a long day at work, we find bliss and rejuvenation in the showers. That is where we say goodbye to all the dirt we have accumulated over the hours and start fresh with a clean body and mindset.
During this wholesome rejuvenating experience, would you like to see mold and mildew growing around you in walls?
Of course not.
And that is where caulking comes in. Along with preventing those unpleasant growths, it also helps with minimizing leaks by sealing grout lines. So here we are to discuss how to caulk a 3 piece shower and guide you through the whole process.
Table of Contents
How To Caulk a 3 Piece Shower:
Requirements:
- Caulk (Silicone-based) (Check Recomended Caulk)
- Caulk gun (Check Recomended Caulk Gun)
- Caulk remover
- Putty knife
- Utility knife
- Razor scraper
- Painter’s tape
- Paper towels
- Mineral spirits
- Household cleaner
- Cloth or sponge
- Multiple rags
- Oscillating tool (optional)
- Caulk removal tool (optional)
- Caulk smoothing tool (optional)
Caulking a 3 Piece Shower: The Steps
1. Remove Old Caulk
The first thing you need to do for laying down the new caulk is to remove the old layer. So take a good look at all the areas you will be applying the fresh layer of caulk on and get started on removing the previous coating.
To complete this step, it would be best to use a caulk removal tool that is specifically designed for such tasks. However, if you don’t have it or can’t find it nearby, you can use a razor scraper instead. Another possible solution is to use an oscillating tool that has been equipped with a flexible scraper blade.
Whichever tool you pick, use it to slice through the old caulk around the usual areas like your tub, shower, floor tiles or wall panels. It is a common mistake to miss out on areas like the joints around the showerhead arms and the escutcheon plates of shower valves. So keep an eye on those spots as well.
Be extra careful if the shower pieces are made from acrylic since they are prone to scratches. The 3-piece showers tend to get wetter than other alternatives. That is why caulks based on silicone would be more appropriate for these showers.
2. Scrub Leftovers
Since you have removed most of the old caulk from the shower surfaces, now it is time to get rid of the remaining pieces. You will need to eliminate any loose grout left on the respective areas like walls, tubs, and shower floor. To do so, you can consider applying a product that eliminates molds.
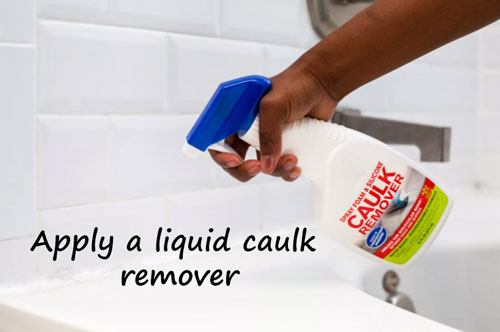
Using a liquid caulk remover may help you in this task by making the old caulk softer and easier to get rid of. These products are specialized to break the bond between old caulk and the bathroom walls, resulting in a layer that is much easier to scrape off.
However, this can increase the removal time since you may need to let it sit on the caulk for four hours or more. Squirt a little bit of this remover on the leftovers and scrape them off with the razor scraper.
3. Wipe It Clean
After scraping completely and making the surface smooth again, wipe that area with a damp rag. For better results, you can use a sponge or a cloth with your household cleaner to thoroughly clean the surface. If there is no cleaner available, you can use a bleach solution instead.
Pour some rubbing alcohol along the gaps to eliminate existing but invisible molds. As a finishing touch, you can clean the surface with mineral spirits. When it has been cleaned enough, wait for the entire area to dry before proceeding to the next step. To speed up the drying process, you can try using a hairdryer.
4. Tape Both Sides
To prepare for the application of a new coating, some experts choose to cover both sides of the joint with painter’s tape. This is also something we recommend since this will give you an accurate view of how deep and long the gaps really go. Additionally, the newly applied caulk will have sharp edges later.
Depending on the gap, the tapes may need to be applied to its upper and lower surfaces, or its left and right sides. Either way, you will need to start with masking the wall corner gaps. Find the largest gap between the walls and your tub or shower since this will tell you the distance between the two tape lines.
After that, you can begin applying the tape around the gaps on other walls in your bathroom. Finish the step by doing it along the joints on the shower floor or tub. Now you can measure how wide these gaps are which will come in handy in the next step. You can do this by marking the edges on either side with a pencil.
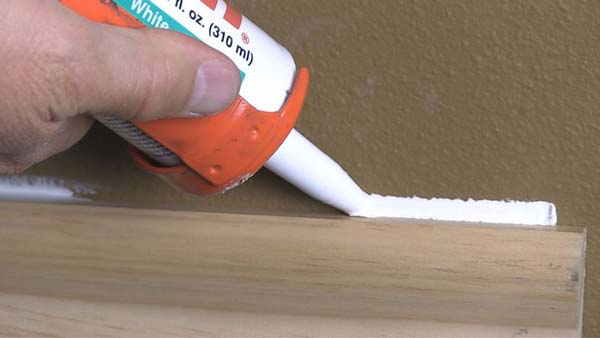
5. Apply Silicone-Based Caulk
Before starting to apply the caulk, you will need to prepare the caulk gun for this particular project. To put it simply, you have to cut its nozzle tip at a 20-degree 45-degree angle and according to the gap width of this shower’s joints. You will know where to cut by identifying the indicator line on its tip.
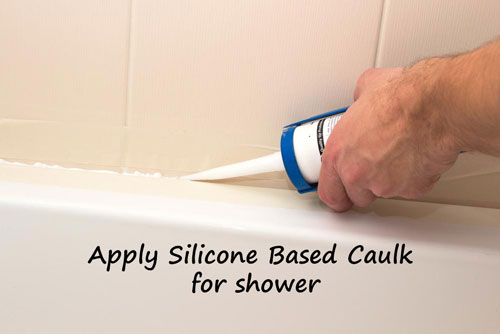
Then hold the caulk gun perpendicular to the gap and squeeze out a bead of caulk. Continue doing so along the joint by pushing the gun forward until you reach the end. It doesn’t have to be smooth all the way but enough caulk needs to be applied to the gaps.
Along with covering the walls, tub, and shower floor, also apply the caulk to gaps available around the escutcheon plates of the showerhead and shower valve.
6. Polish and Wait 24 Hours
Now all there’s left to do is polish the new coating and wait! To make the caulk layer smooth, you will only need your finger and some water! Such an angled bead will help to repel water more effectively.
So run your finger in some water and wipe it across the new caulk layer, starting from one of the outer corners. This will make the beads rounded, force them into the joint, and remove excess material automatically from the gaps at the same time.
Then start to peel off the tapes from earlier by lifting a corner and pulling it at a steep angle. Begin at the tub, move to the walls and finish at the wall corners. Remember to complete this step when the caulk is still wet. Wait for 24 hours till it gets completely dried.
Final Words
Since caulking is not permanent, you will need to implement this process at least once every five years. If it is a new home, you may have to do it after a year or so.
Knowing how to caulk a 3 piece shower may not seem so impressive right now. However, once you realize how much it is adding to the aesthetics and how much it is reducing the bathroom maintenance issues, you will surely appreciate caulking.