Removing caulk from painted walls can be tedious due to its highly adhesive nature. This, however, doesn’t mean that the task is impossible. Provided you’ve got the right tools and techniques, you can remove dried caulk from any surface.
Even better, this will minimize the amount of repair to your painted drywall. And in this article, we’ll show you how to remove both silicone and latex sealants from painted walls, THE RIGHT WAY!
So let’s start by some of the things you’ll need to get the task done right and quickly!
Table of Contents
Things Needed to Remove Caulk from Painted Wall
- Caulk remover solvent (Softener)
- Caulk removal tool/ Razor blade scraper
- Utility/ putty knife
- non-ammoniated cleaner/ bleach
- Sponges
- Small bowl
- Clean cloth
- Fine-grit (120-grit) sandpaper
How to Remove Silicone Caulk from Painted Walls
Silicone is a little bit more difficult to remove from painted walls than latex sealants. Hence, you should work slowly and carefully to minimize damages to the wall.
With an aggressive commercial caulk remover solvent in your hand, it’ll be much easier to scrape, cut, and pull off the silicone right from the painted drywall!
1. Soften the Caulk
Start by wearing a pair of protective gloves for safety purposes. Then apply the caulk removing solution to the silicone sealant. Make sure you follow the instructions on the remover’s packaging while doing that. This will help you knowing how to apply and how long should it leave to work.
Despite the name, a caulk remover doesn’t separate or get rid of the sealant. Instead, the solution softens the bead, thus making it easier to scrape off.
Alternatively, you might also use a heat gun or a hair dryer to heat up the silicone. This will soften the layer to make scraping off way easier with a knife.
2. Strip the Large Sections
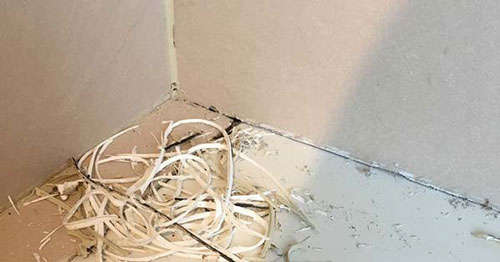
Grasp the large sections of loose sealant with pliers or your fingers and pull them off. Hopefully, some of the large chunks should come out easily. If it still leaves some parts stick to the surface, use the removal tool or a putty knife to scrape them off.
To use these tools, hold them at an angle of 30 degrees to the wall. Slowly scrape off the silicone starting at the point where the scraper gets tight to the wall.
Make sure you apply uniform pressure while scraping the sealant to avoid wall damage. Dispose of the removed silicone pieces properly. Moreover, wipe away any accumulated silicone on the edge of your tool with a cloth from time to time.
3. Clean the Surface
After removing the large sections, a thin residue layer will be left behind. Please fight your urge of using sandpaper right away because we’ll need that later in this step. This is because the sandpaper will roll them into small balls, rather than removing them.
Instead, wipe the surface with a rag soaked in mineral spirits or vinegar solution. And leave the dampened rag on the residues for several hours.
Similar to caulk remover, the vinegar solution will soften the residues. This makes it easier to scrape them off with a scraper or knife. Also, you can soften the caulk with isopropyl alcohol. However, you should be very cautious to avoid accidents since alcohol is flammable.
Scrub away the loose fragments with a dry cloth or sponge after softening the residues.
Then use needle-nose pliers to get rid of the remaining pieces. Wipe the surface with a damp sponge/ cloth to remove any silicone residue. Repeat this process until you remove the silicone caulk residue from painted drywall entirely.
Finally, you can buff the wall with fine-grit sandpaper. This will finish up and give you a smooth surface which is ready for painting or applying new wallpaper.
How to Remove Latex Caulk from Painted Wall
The process of removing latex caulk from painted drywall should be less tedious than what we’ve seen with silicone. Thankfully, the following steps will help you achieve! Just go slow to minimize damages on the surface when you are done.
1. Use Caulk Remover
Similar to the previous steps, use caulk remover to weaken the inner structure of dried latex caulk. This will make the process even easier and effortless. However, you need to be patient at this point for effective results. You should allow the solvent to sit for about 3-4 hours.
If you’re dealing with multiple layers of old, hardened sealant, wait overnight or 24 hours.
Note that some sealant removers are not suitable for use in certain materials. For that, it’s important to read the manufacturer’s instructions before you apply them to the wall. If it’s not compatible, I’d suggest you remove the sealant physically instead!
Also, you can soften latex by rubbing it with a sponge/ cloth soaked in isopropyl alcohol.
2. Use a Removal Tool
Most professionals use putty/ utility knives to remove loose caulk from painted walls. However, if your hands aren’t steady, I’d suggest you stick to a commercial caulk removal tool. These are specialized tools that help to tear away latex sealants cleanly.
Either way, you need to be cautious to avoid scratching the painted surface or digging too deep.
That’s said, a sealant removal tool peels away long strips easily enough. But if you’re dealing with multiple sealant layers, you can use tweezers or needle-nose pliers as well.
3. Removing Residue and Touching Up
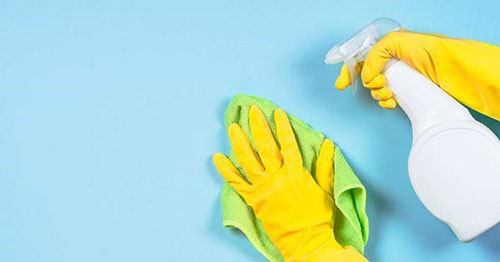
Scrape the surface to remove the remaining bits of loose sealant. Here, you can use a painter’s tool, putty knife, or a toothbrush. Once done, thoroughly clean the surface to remove any residues or scum. You can accomplish that by cleaning the wall using a cloth dampened with alcohol.
Next, mix 1 gallon of water with 1/3 cup of a non-ammoniated cleaner/ bleach. Soak a clean cloth in that mixture, wring it out and use it to brush the surface. This step is intended to kill any mildew or mold. Finally, let the wall air dry before you apply new paint or sealant.
Conclusion
Getting rid of silicone or latex caulk from painted walls can be very frustrating. Luckily, with the right tools and know-how, you can remove it without damaging the surface.
Nonetheless, you still need to be cautious, especially when using tools with sharp edges. Apart from damaging the wall surface, such tools can accidentally cut you as well. So, make sure you go slow and work carefully to get the task done right!